Share a little good energy.
Start with the room and the exact fixture
A two-story foyer is a different project from replacing a light over a dining table. The fixture may hang above stairs, face an upstairs window or require equipment that must fit through your front door. A product photo cannot answer those questions.
Before buying, share the exact model and installation instructions with your electrician. Take room photos from the floor and existing landings; leave elevated measurements and inspection of the ceiling connection to the crew. Useful details include:
- Fixture dimensions, assembled weight and the complete hanging-height range.
- The ceiling shape, location of the existing light and any desired relocation.
- Doorways, stairs, floor finishes and available access above the ceiling.
Verify the weight and what will carry it
Ask for the chandelier's assembled installed weight, including its glass, crystal and other components. Shipping weight includes packaging and is not a reliable substitute. If the specification is unclear, have the supplier confirm the information before the support is designed.
Your electrician checks the existing box, attachment, framing and the fixture's mounting requirements together. An old light working normally does not establish that its support suits the replacement. Some fixtures require support independent of the electrical box. Conversely, an existing box does not automatically need replacement simply because the new light is a chandelier. The actual equipment and installation determine the scope.
Match the slope, canopy and hanging hardware
A sloped-ceiling label is a starting point, not confirmation that every angle or mounting arrangement works. Have the installer check the actual slope against the manufacturer's approved canopy, swivel, adapter or hanging system. A rigid-stem fixture and a chain-hung fixture can have different limitations.
Confirm the finished drop with the supplied stems, chain or cable, allowing for the canopy and fixture body. Ask about approved extension parts, compatible finishes and available conductor length before ordering. Extra chain alone does not solve a short electrical lead, and a part that looks similar may not be approved for the fixture. Let the electrician and manufacturer resolve any mismatch.
Agree on the finished height from every viewpoint
Decide where the lowest part of the assembled fixture should sit, then check that choice against the room's circulation, doors, stair travel and upstairs sightlines. A dining-table styling guideline should not be transferred to a stairwell or open walkway.
Ask the installer to verify the applicable clearance requirements for the actual location, including any nearby ceiling fan. Establish the height before cutting or finalizing hanging components. In a vaulted room, discuss whether the fixture should align with the table, entry or another feature; the roof peak may not be the useful center of the space.
Choose the light source and controls together
Decide whether you want dimming, which switch locations should operate the fixture and whether smart control matters. For replaceable lamps, check the permitted lamp type and wattage, then choose compatible dimmable lamps and a suitable dimmer. A dimmable LED label alone does not confirm that a particular combination will perform well.
Integrated LED fixtures can have specific driver and control requirements. Give the electrician those details before selecting a switch. Lutron's compatibility resources are useful for its tested combinations. At handover, try the agreed dimming range and every control location, and raise any flicker, buzzing or unexpected behavior while the crew is there.
Plan access before installation day
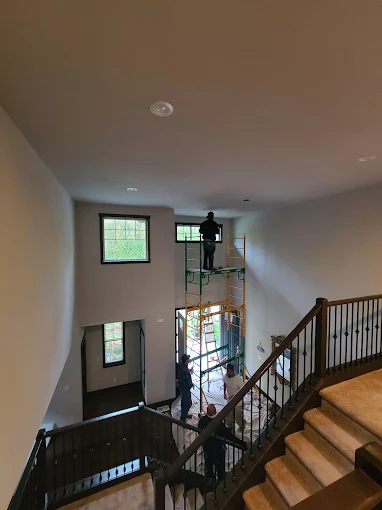
Tell the crew about stairs, narrow entrances, delicate flooring and furniture that cannot easily move. The access method depends on the room and the work: appropriate scaffolding or other equipment may be needed, especially where there is no level floor directly beneath the fixture.
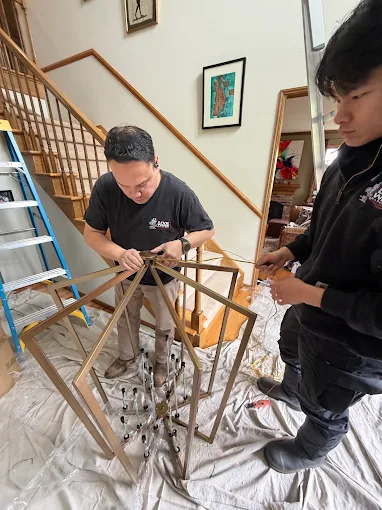
Have the contractor choose and set up the equipment. Do not improvise a ladder arrangement over stairs to take measurements or save setup time. Agree on the delivery route, protected work area and how household members will use another route while work is overhead. Access and fixture assembly should be included in the quote.
Make future cleaning and service practical
Ask how someone will safely clean the fixture, replace lamps or service an LED driver later. Long-life lamps can reduce visits, but they do not eliminate access needs. Follow the fixture manufacturer's cleaning instructions; finishes, glass and decorative materials may require different care.
A chandelier lift may be worth discussing where access is difficult. It is a separate system with model-specific weight, electrical, mounting and service-space requirements. Have both manufacturers' requirements checked, including any sloped-ceiling arrangement. Ask whether the home can accommodate it and what building work would be needed.
Protect the fixture and the room
Confirm who will inspect the delivery, inventory fragile parts and assemble the fixture. Keep packaging and documentation until the installation is complete and accepted. Report missing or damaged components before the scheduled work; do not assume a substitute part will be suitable.
Agree on floor and finish protection, a clean assembly area, removal of the old fixture and any ceiling patching or painting. Moving the electrical connection or changing the canopy size may expose unfinished surfaces. Confirm who handles those repairs so the electrical installation and the finished appearance are both accounted for.
Get a clear written scope
Ask the quote to identify the fixture, support work, hanging parts, access equipment, controls, assembly and finishing responsibilities. It should explain what remains uncertain until the existing installation is inspected and how any additional work will be agreed.
In Washington, permit requirements depend on the work and jurisdiction. Ask your electrical contractor to confirm whether permits and inspections are required and who will arrange them. L&I directs hired contractors to obtain their own required permits. With the model, room and access plan settled, you can compare proposals on the same scope instead of guessing what a basic installation price includes.
Helpful sources
Official guidance for a closer look.

From our crew to your home.
Live Wire Electric
We’re your Lynnwood-based electrical crew, helping homeowners understand their options and plan their next step.
Meet your local crewA good idea is better shared.